Accessing Your Account:
You likely received a "Welcome to HubOne!" email invitation.
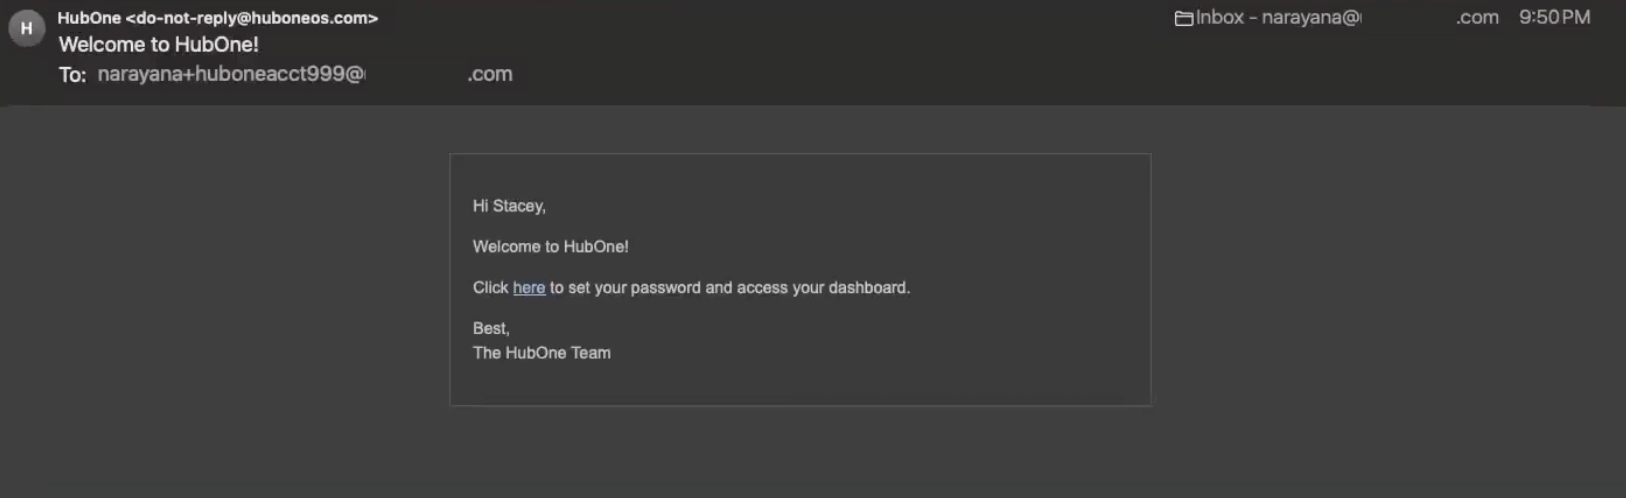
Click the link provided in the email.
You will be prompted to set a password for your new HubOne account. Create and confirm your password.
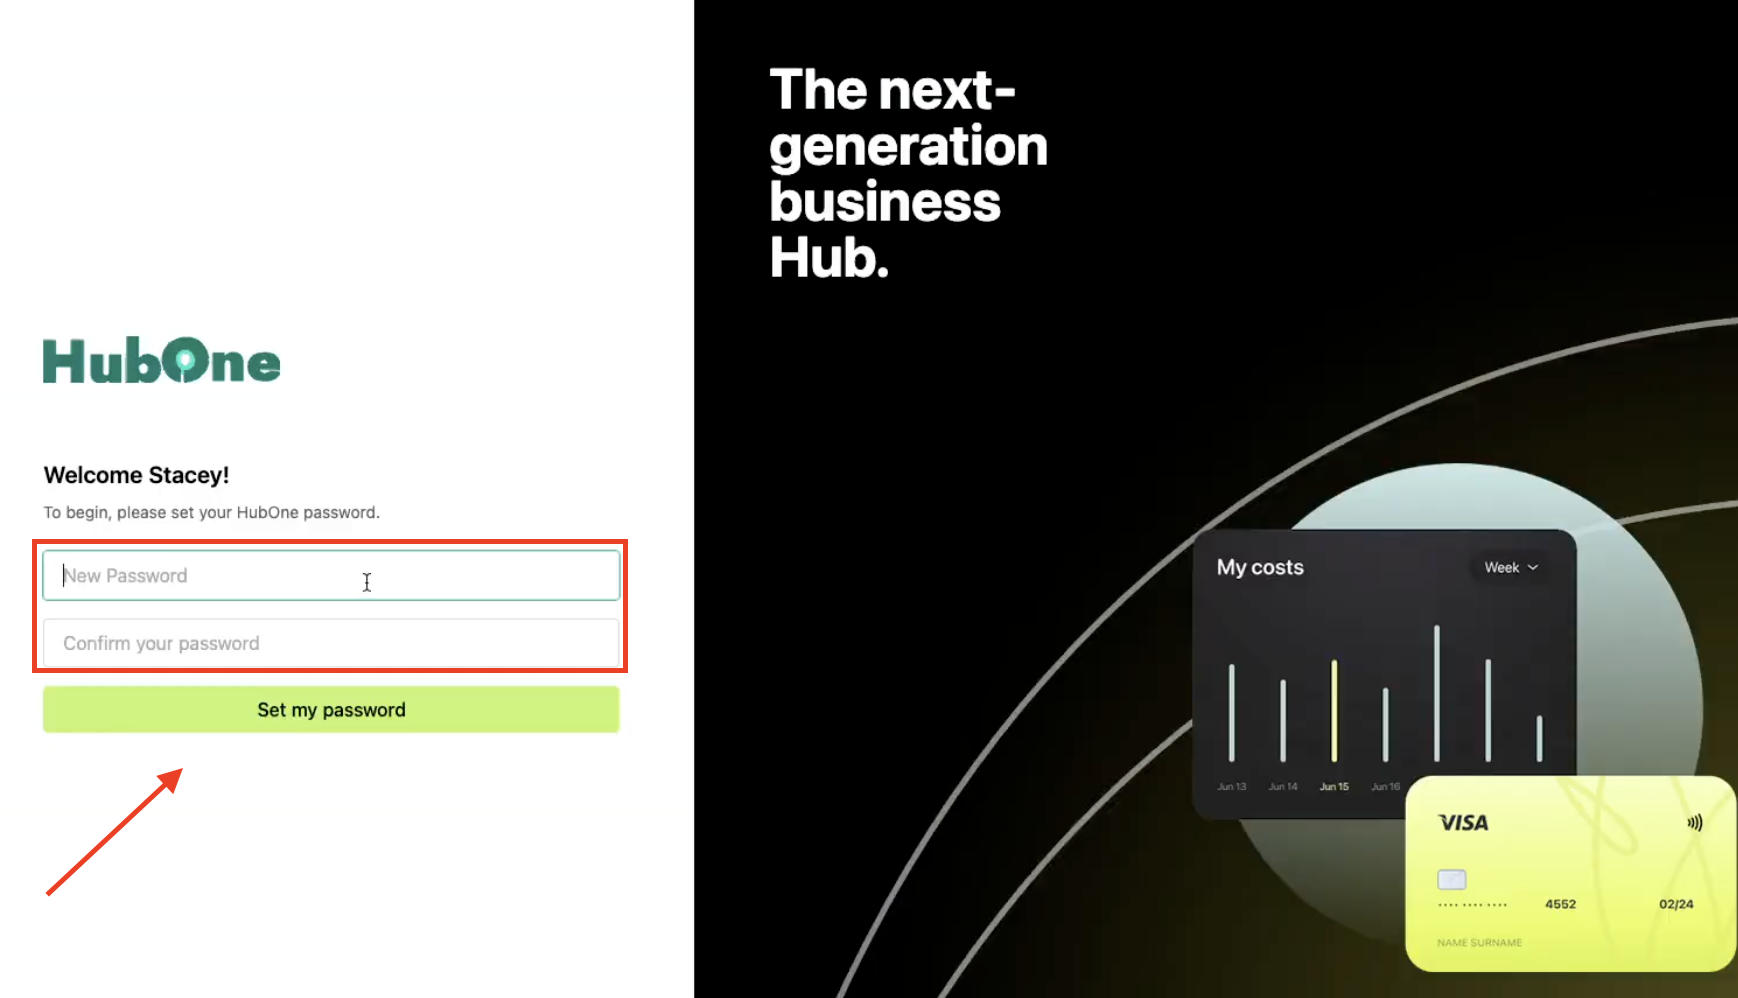
You can then log in using your email address (provided during setup) and the password you just created at the dedicated HubOne login URL
Navigating Your HubOne Account:
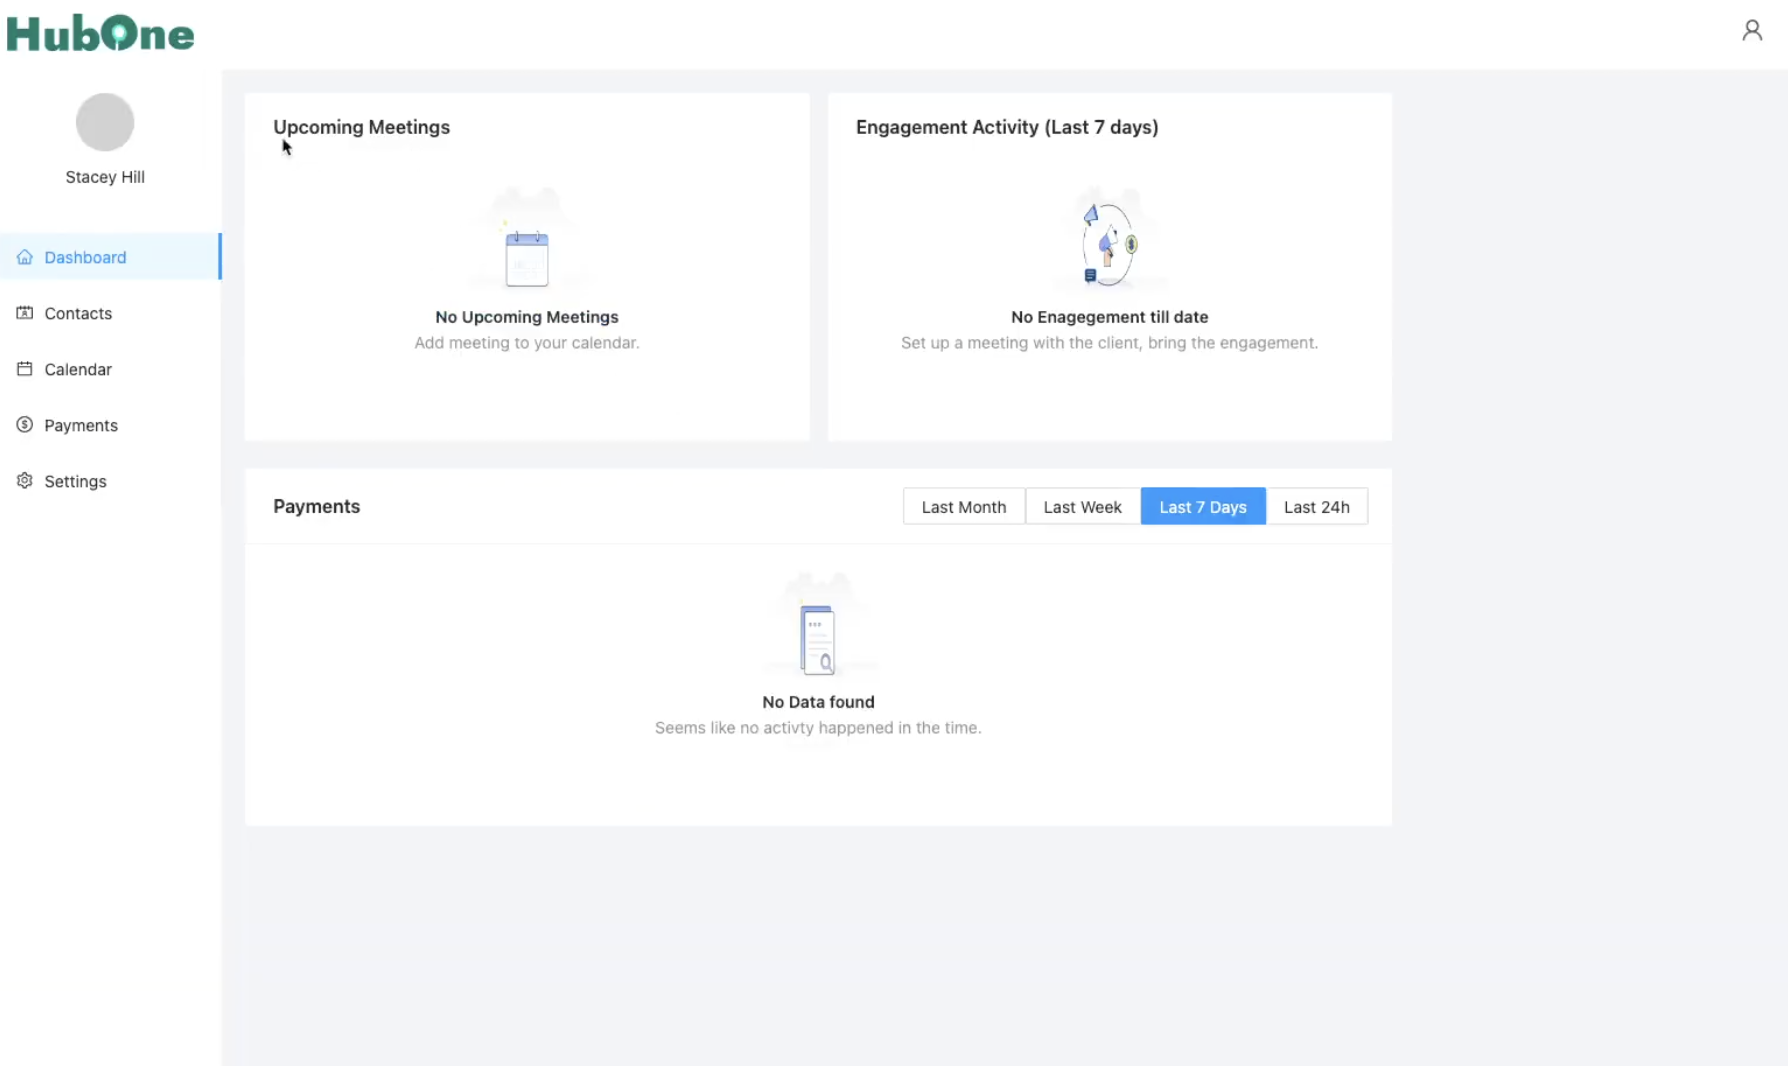
Once logged in, you'll see a navigation menu on the left and the main work area. Here's a breakdown of the key sections:
Dashboard: Your central overview. Initially, it might show empty widgets for "Upcoming Meetings," "Engagement Activity," and "Payments." These will populate as you add contacts, schedule meetings, and send/receive communications and payments.
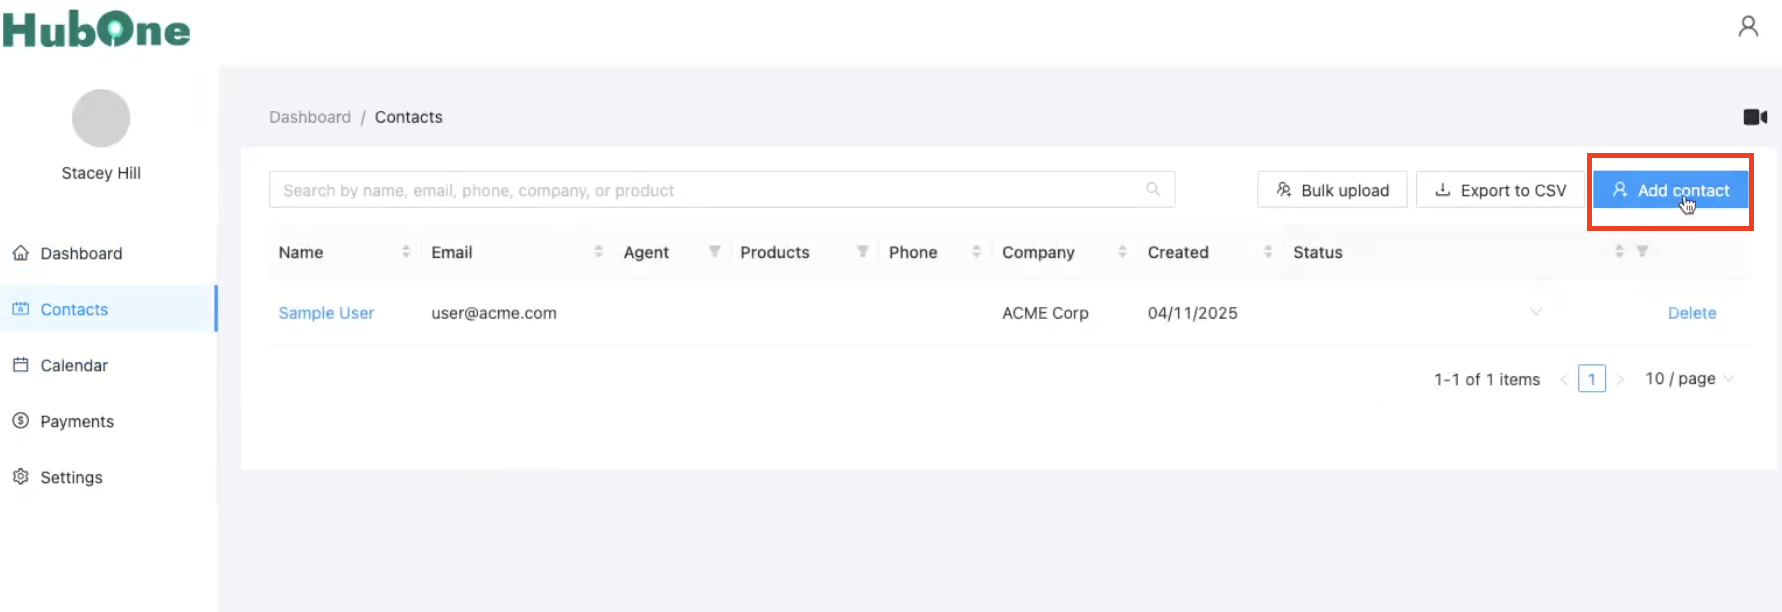
Contacts: This is your core Customer Relationship Management (CRM) area.
You can view existing contacts (a sample user might be present initially).
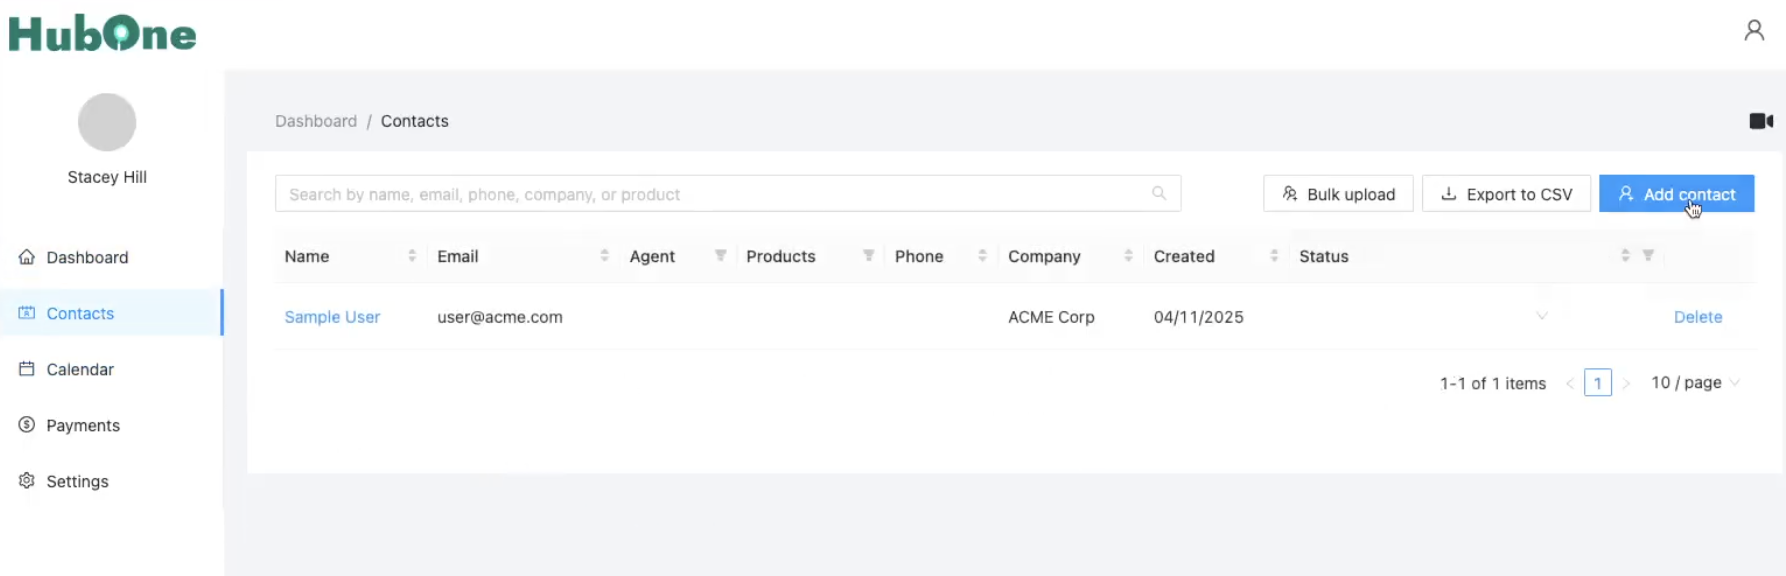
Click + Add contact to enter new customer details (name, email, phone, company, address, status, custom fields, etc.).
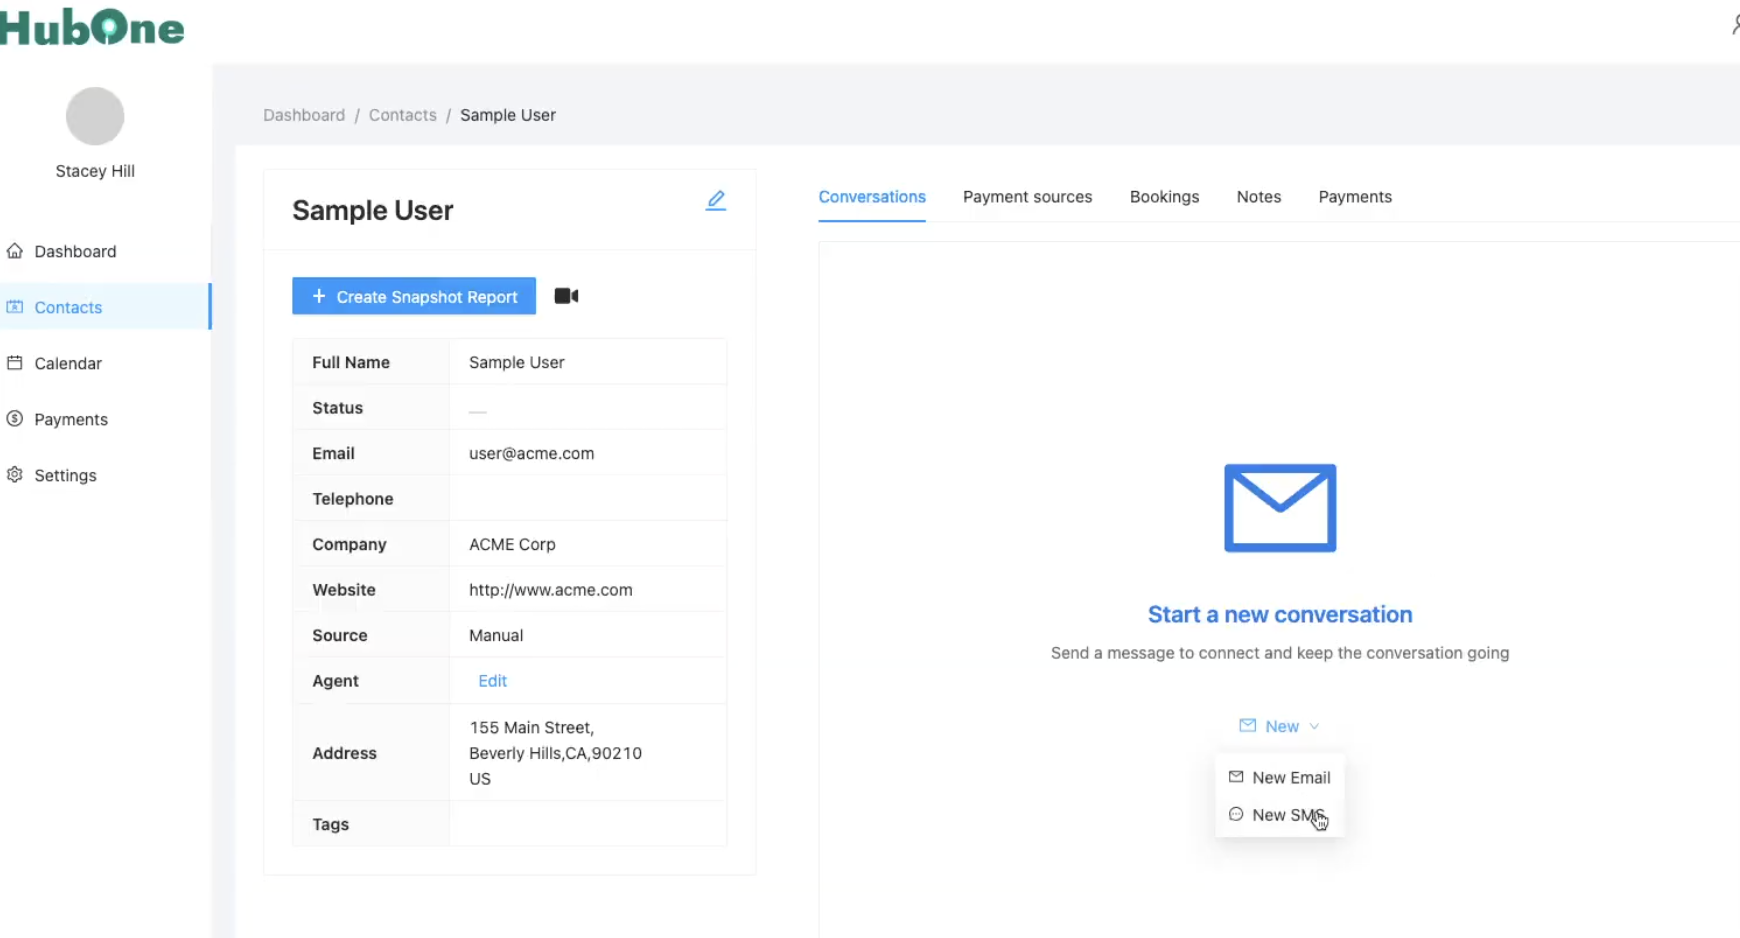
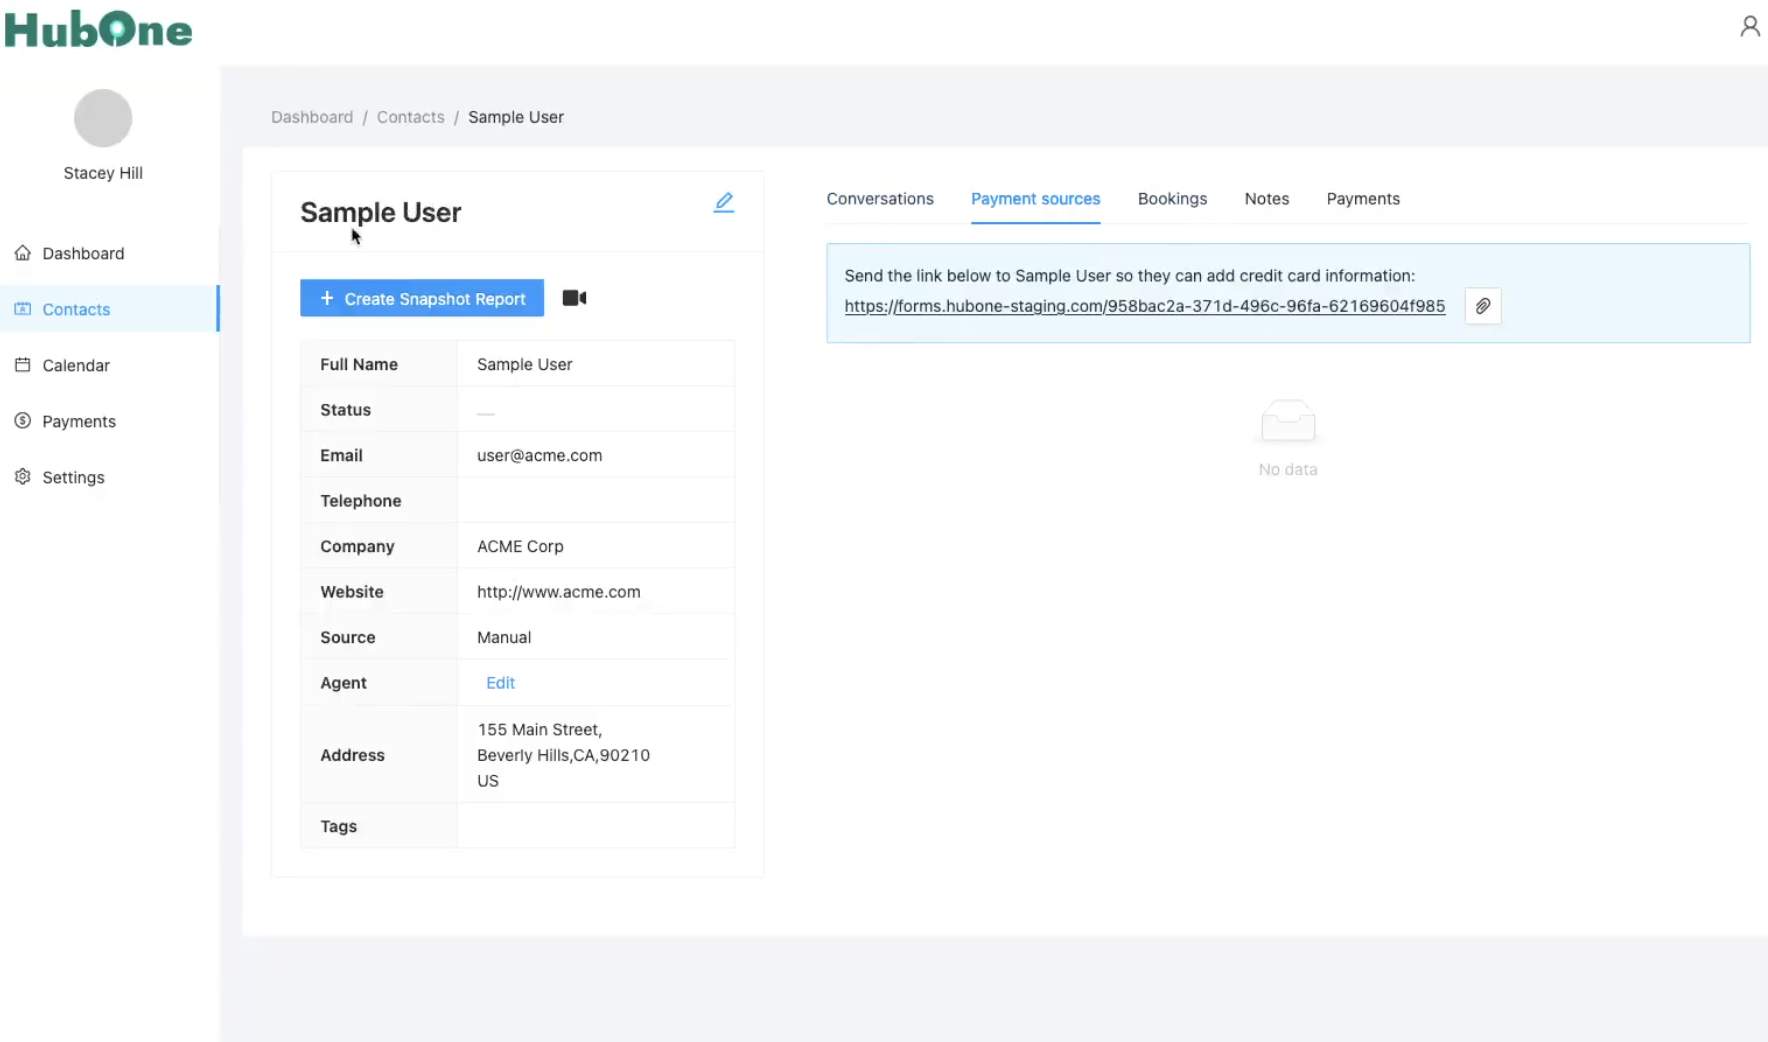
Clicking on a contact's name opens their detailed record, which includes tabs for:
Conversations: View email and SMS history with this contact. Compose new messages here.
Payment Sources: (If applicable) See saved payment methods for this contact.
Notes: Add and view notes specific to this contact.
Payments: See invoices sent to this contact.
(Other tabs like Products, Vendor Quotes, Reports, Bookings are also available).
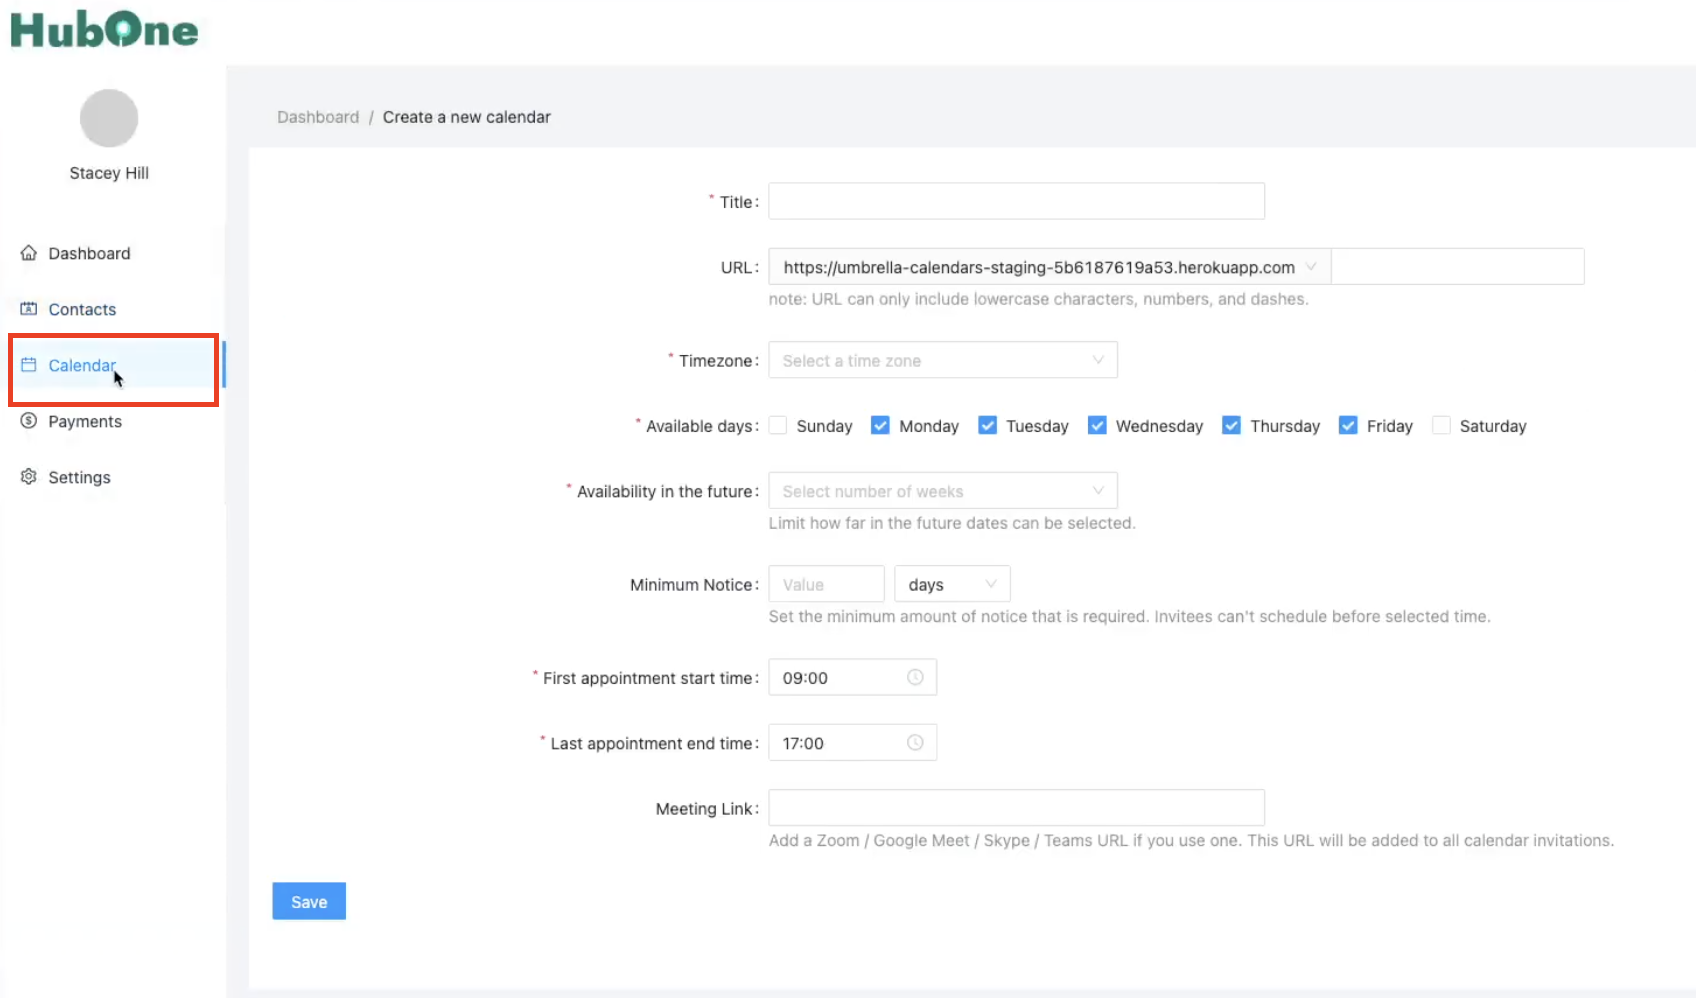
Calendar: Manage your appointments and availability.

Create new calendars for different types of bookings.
Configure availability, booking link URLs, meeting durations, buffer times, connected calendars (like Google/Outlook), and meeting links (Zoom, Google Meet, etc.).
Payments: Manage invoicing for your clients.
My Invoices: View a list of invoices you've created.
Create Invoice: Generate new invoices to send to your contacts
Invoice Design: Customize the look and feel of your invoices.
Settings: Configure your HubOne account settings.
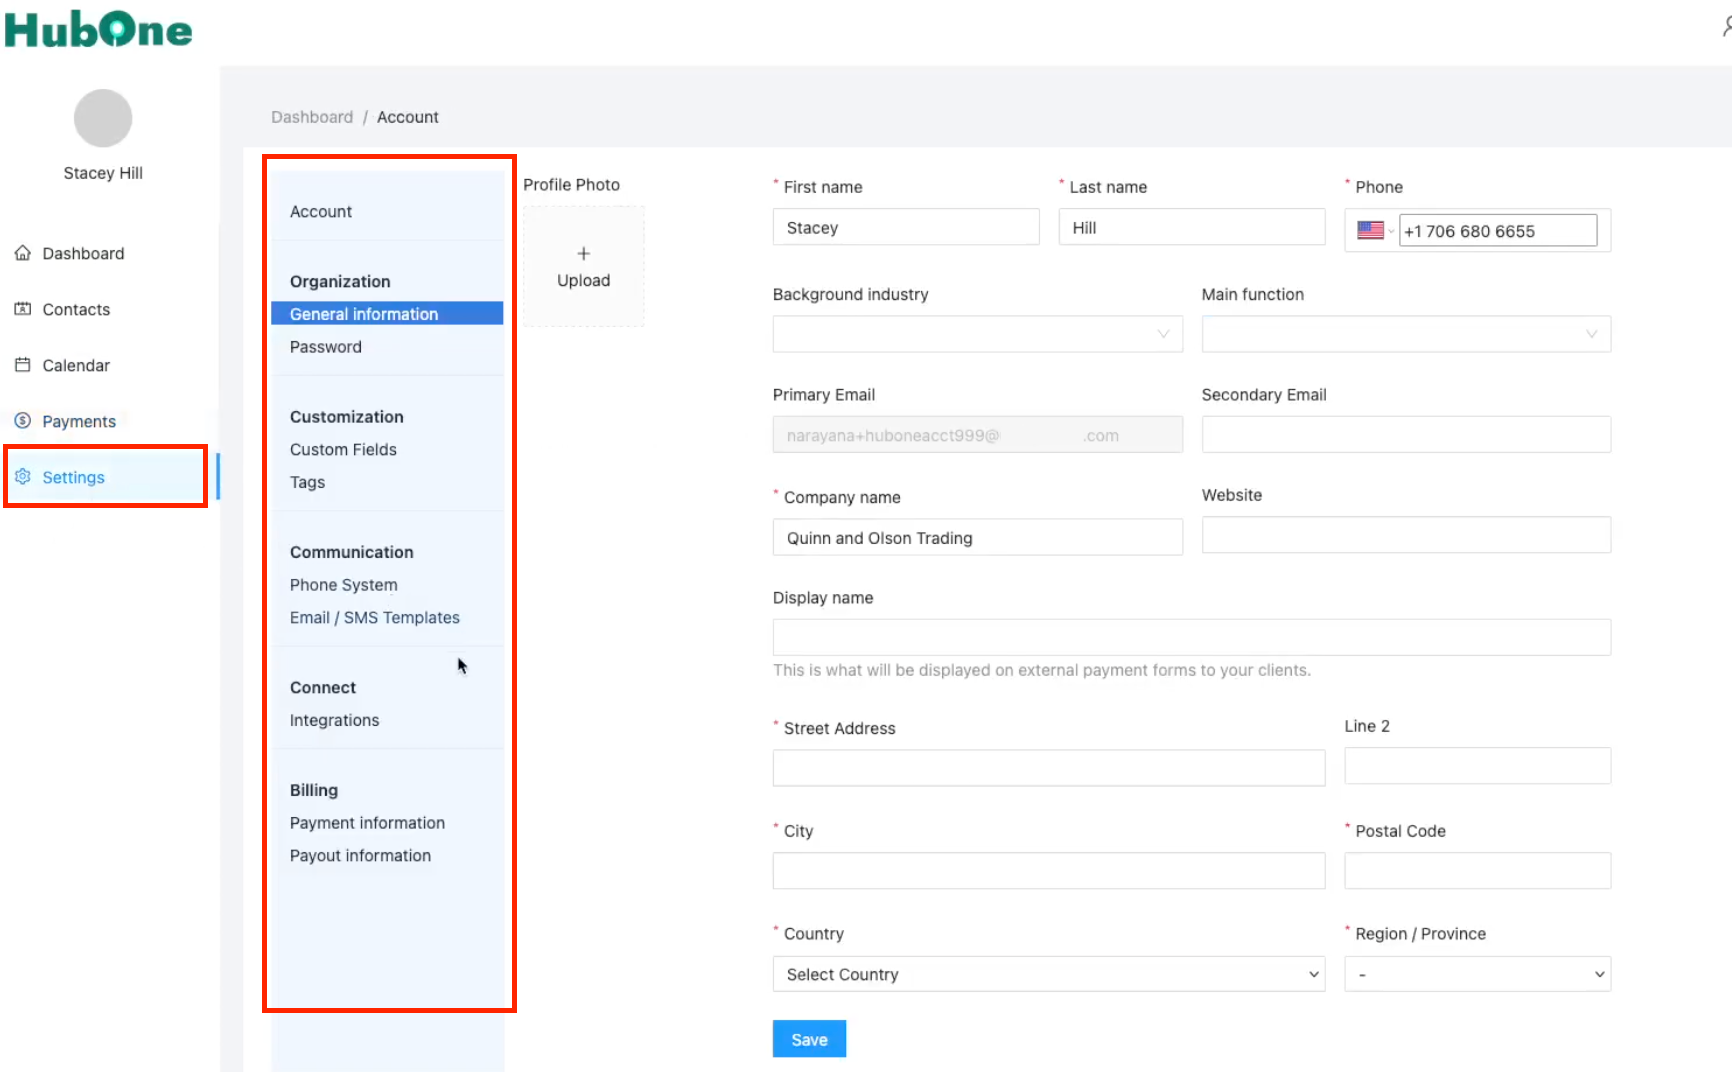
General Information: Update your profile details (name, company, address, etc.).
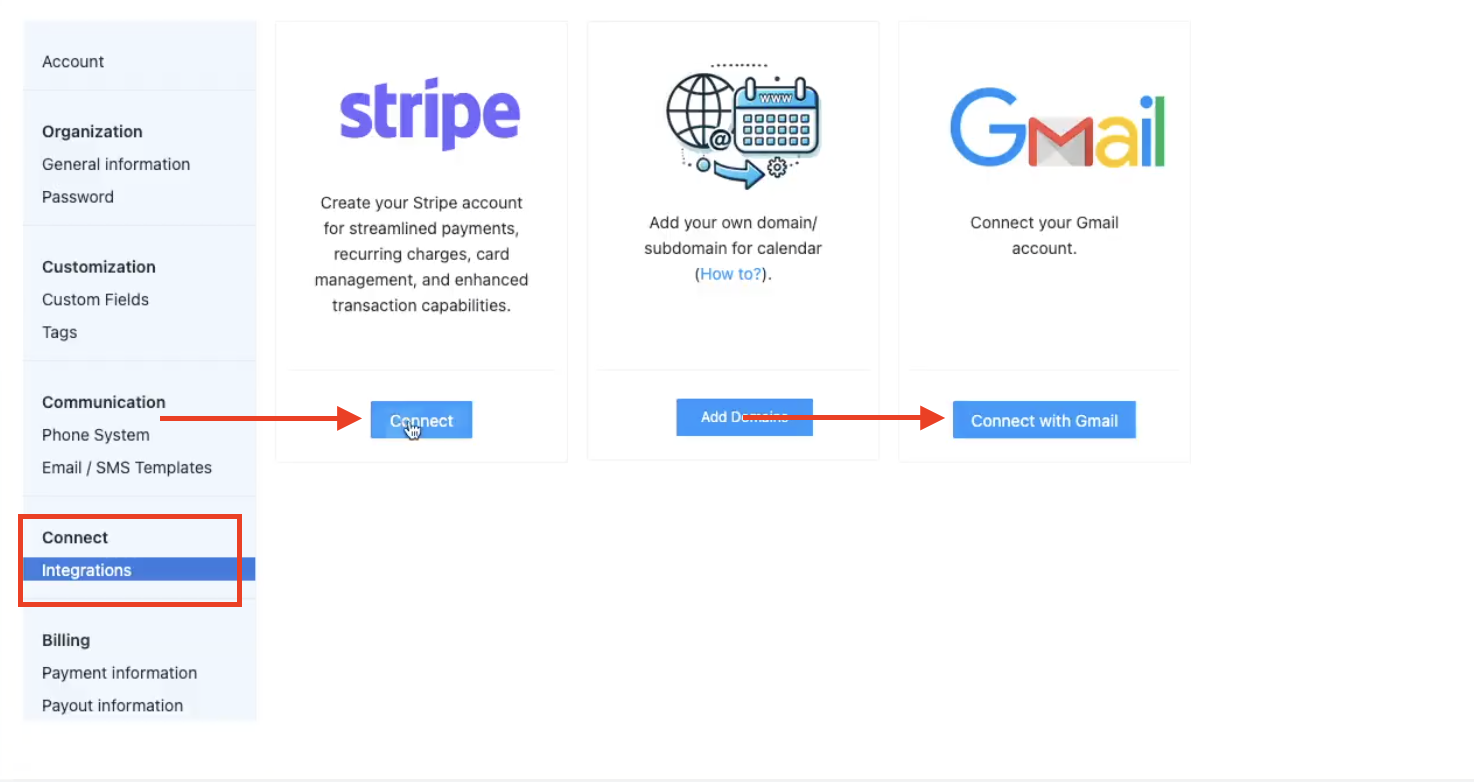
Integrations: This is crucial!
Stripe: Connect your own Stripe account to receive payments directly from invoices you send to your clients.
Gmail: Connect your Gmail account to send and receive emails directly within the HubOne Conversations tab.
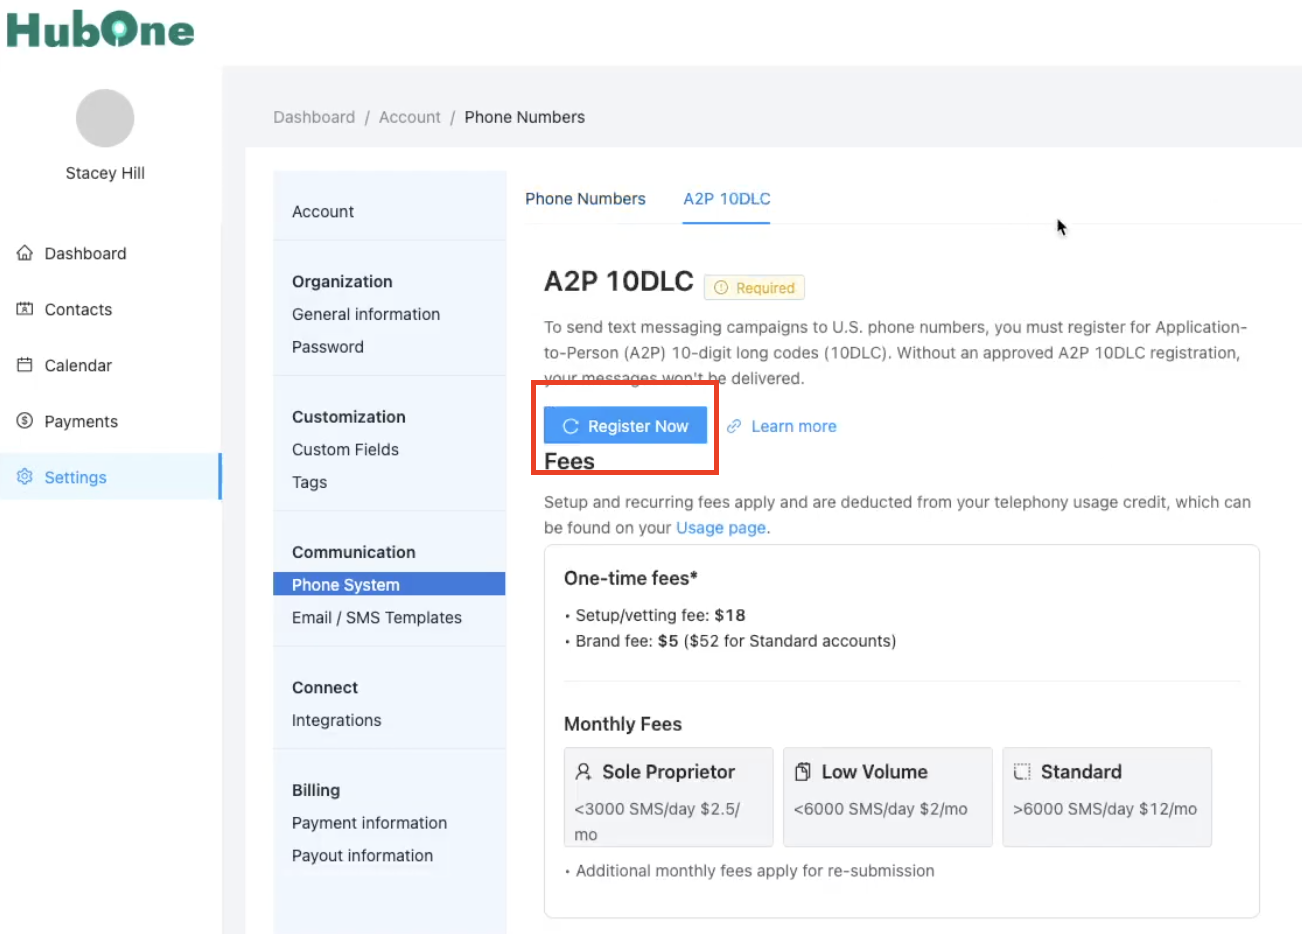
Communication > Phone System:
Phone Numbers: Purchase dedicated phone numbers (requires funds in your service provider's Wallet).

A2P 10DLC: Required for SMS to US numbers. Register your brand and campaigns here to comply with messaging regulations. Note that registration involves one-time and potentially recurring fees, which are typically handled via your service provider's Wallet.
Billing: View your payment information (the card used for your HubOne subscription, if applicable) and payout information (if configured).
Key Functionality Highlight: Conversations & Dynamic Variables
When composing an email from the Contacts > Conversations tab:
You can use Email Templates (that you or your service provider create) to quickly insert standard messages.
Use the Dynamic Variables button {} in the editor to insert personalized information directly from the contact's record (like {{ contact.first_name }}, {{ contact.email }}) or your own user details ({{ user.first_name }}). This saves time and ensures accuracy.
Add Attachments using the paperclip icon.
Your HubOne account provides powerful tools to manage your client interactions and business processes. Explore the different sections to familiarize yourself with the capabilities.