Creating Your First Workflow
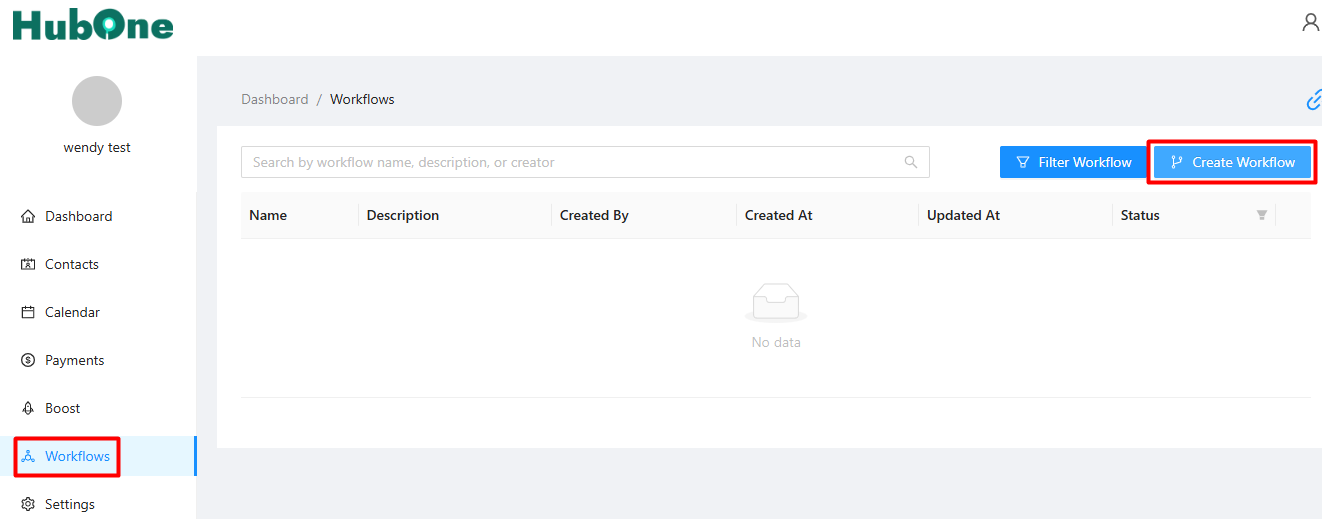
To begin, navigate to the "Workflows" section found in the left-hand menu of your dashboard. Once there, click the blue "Create Workflow" button located in the top right corner.
You'll then be prompted to give your workflow a name and an optional description, this helps you identify the purpose of each workflow later on.
After these initial details are saved, your new workflow will appear in the list with a "Draft" status. To start building the actual steps and logic, click the "Actions" dropdown next to your workflow and select "Open Editor."

It's important to note that any changes made within the editor don't make the workflow live immediately. It will remain in "Draft" mode until you explicitly go back to the main workflow list and "Publish" it from the "Actions" menu.

Building Your Workflow: Triggers and Actions
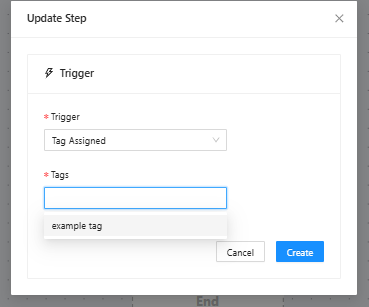
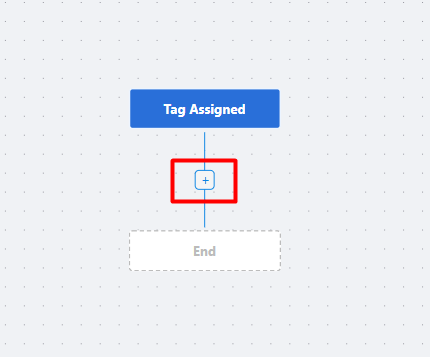
Inside the workflow editor, the first essential step is to "Add Trigger." This defines the event that will initiate the workflow for a contact.

Currently, workflows can be triggered when a specific "Tag is Assigned" to a contact or when a "Tag is Removed." You have the flexibility to select one or multiple tags to serve as the trigger.
Once a trigger is set, you can add a sequence of actions.
The available actions include:
Send Email: Delivers an email to the contact.
Send SMS: Sends an SMS message (if SMS integration is active).
Add/Remove Tag: Modifies the tags associated with the contact.
Time Delay: Pauses the workflow for a specified duration.
If/Else Rules: Creates conditional branches in your workflow.
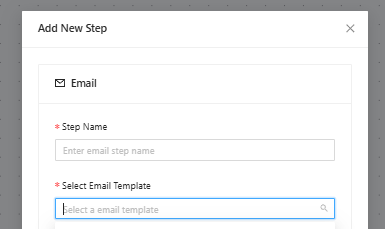
When you add a "Send Email" action, you'll need to name this step (e.g., "Welcome Email”) and, crucially, select a pre-existing Email Template.
While the ability to create emails directly within the workflow editor is planned for the future, you currently need to have your templates prepared beforehand.
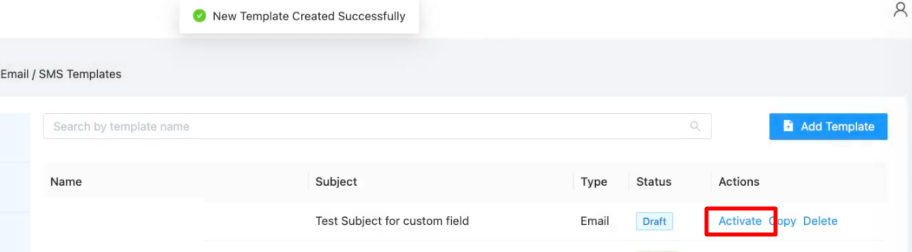
After creating a template, it will initially be in "Draft" status. You must click "Activate" next to it in the template list to make it active and selectable within your workflows.
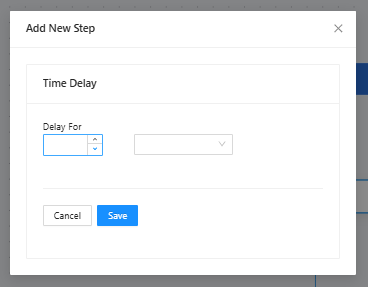
To control the timing of your automations, the "Time Delay" action allows you to pause the workflow. You can set delays in seconds, minutes, hours, or days, such as "Wait 1 day" before the next action occurs.
The "If/Else" condition is a powerful tool for creating sophisticated automations by introducing branching logic. For example, you can check if a contact "Last Email Link Clicked." Based on this, the workflow will follow a "Yes" path if the link was clicked, or a "No" path if it wasn't. You can then define different subsequent actions for each of these branches.
The conditions available for an "If/Else" step include:
Whether a contact has a specific Tag.
If the Last Email was Opened.
If a Last Email Link was Clicked.
If an Email Response was Received (this checks for replies to any email sent within this workflow up to the current step).
If a Last SMS Link was Clicked.
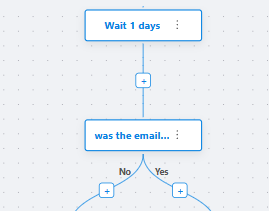
As demonstrated, you can build complex sequences. For instance, after a welcome email and a one-day wait, an If/Else condition could check if the training link in the email was clicked. If "Yes," the workflow might end. If "No," a follow-up SMS could be sent. You can then add another delay and another If/Else condition, perhaps checking if a link in the SMS was clicked, and so on, creating deep and responsive automation funnels.